As a homeowner, I get how tough it can be to clean kitchen floor grout. The idea of scrubbing away with strong chemicals isn’t pleasant. But, what if I shared a way to clean grout naturally, without toxins? We’ll look at methods that won’t harm the environment, using items you likely have.
Just imagine, grout looking brand new with simple and ecological methods. You might have years of dirt or just need to keep already clean tiles, these natural grout cleaning tips are ready to help. Soon, dull grout will be a thing of the past, and your kitchen floor will shine bright and clean.

The Miracle DIY Grout Cleaner
Scrubbing kitchen floor grout might seem hard, but there’s an easy way. Mix baking soda, hydrogen peroxide, and dish soap for the best DIY grout cleaner. These ingredients team up to clean grout well.
A Combination of Baking Soda, Hydrogen Peroxide, and Dish Soap
Baking soda scrubs away dirt from grout easily. Hydrogen peroxide whitens and disinfects, getting rid of tough stains. And dish soap helps cut through grease, making cleaning more efficient.
The Ingredients and Their Roles
- Baking soda: Removes tough dirt and grime gently.
- Hydrogen peroxide: Whitens the grout and disinfects it.
- Dish soap: Cuts through grease, making soil removal easier.
Together, these simple grout cleaning ingredients do wonders. They’ll turn your grungy kitchen floor grout into shining tiles.
“The DIY grout cleaner recipe suggested mixes two parts hydrogen peroxide with one part baking soda. It also includes dish soap.”
Using this homemade grout cleaner will make your kitchen floors look new. It’s a cheap, natural way to get professional results. And no nasty chemicals are needed.
How to Clean Kitchen Floor Grout Naturally
Step-by-Step Instructions
Cleaning kitchen floor grout naturally is easy. You can do this with a few household items. This method not only cleans but also refreshes your tile floors. So, let’s get started with this natural grout cleaning method.
- First, mix 1/2 cup baking soda, 1/4 cup hydrogen peroxide, and 1 tablespoon liquid dish soap in a bowl. This mix is a strong yet gentle grout cleaning solution.
- Apply the mix on the kitchen floor grout with a scrub brush or sponge. Make sure every grout line gets covered well.
- Leave the solution for 5-10 minutes. This lets it work on any dirt or stains in the grout.
- Now, take a stiff grout brush and scrub. Use strong, circular motions to clean deeply.
- After scrubbing, use a broom to sweep up the excess baking soda or dirt.
- Finally, mop the area with hot water and a natural tile cleaner. This washes away any leftover residue, leaving your floor clean.
You might need to repeat the process on your whole kitchen floor. But, it’s a great way to keep your grout looking bright and clean naturally.
“This natural grout cleaning method is a game-changer! It’s so easy, and my kitchen floor looks brand new.”
Don’t forget, regular care and sealing of your grout helps avoid future problems. By using these step-by-step instructions for cleaning kitchen floor grout naturally, your floors will stay beautiful for years.
Before and After Comparison
This natural grout cleaning method stands out for the big grout transformation it brings. The before and after pictures make it clear. They show a major change from dirty grout to clean grout.
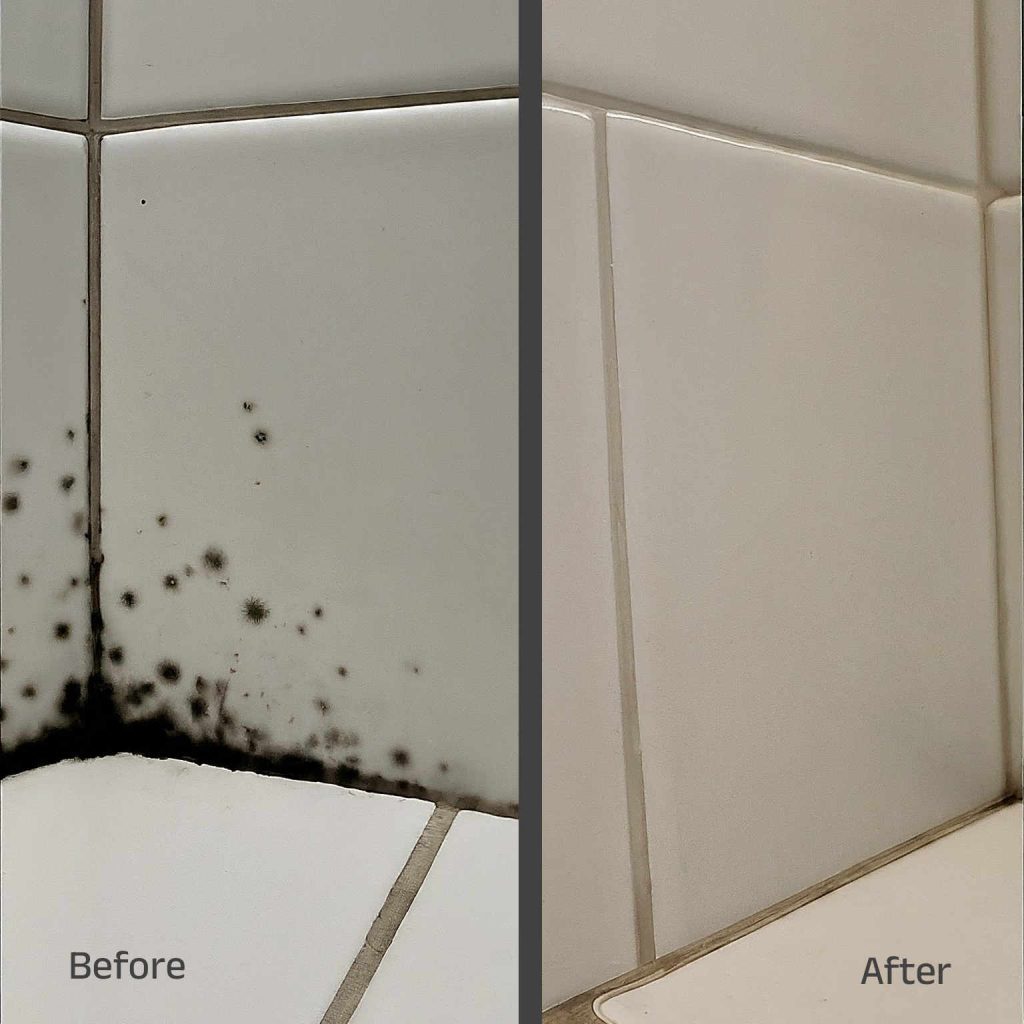
In the “before” shots, the kitchen floor grout looks bad. It’s discolored, stained, and grimy. The once-white grout now holds years of dirt.
Using the baking soda mix and scrubbing it changed everything. The clean grout that comes out is truly stunning.
The “after” photos reveal a different story. The grout is now clean and white again, looking like new. This grout cleaning method proves to be both effective and affordable.
“The before and after photos clearly demonstrate the dramatic transformation that can be achieved by using this natural grout cleaning method.”
Following the simple steps and using the powerful mix can make your grout look brand new. This really changes how your kitchen feels. The grout cleaning before and after results truly speak for themselves.
Tips and Tricks for Cleaning Grout Naturally
Cleaning grout to a sparkling level might seem tough, but here’s how to do it without harsh chemicals. Using some easy tips can get your kitchen floor grout looking great. Without unhealthy cleaning solutions, your floors can shine:
- Work in Small Sections: Cleaning a small area at once lets you focus. This way, you ensure deep cleaning and avoid quick-drying.
- Let the Cleaner Sit: Leave your natural cleaner on for 5-10 minutes before scrubbing. This time helps the cleaner break down the dirt and grime.
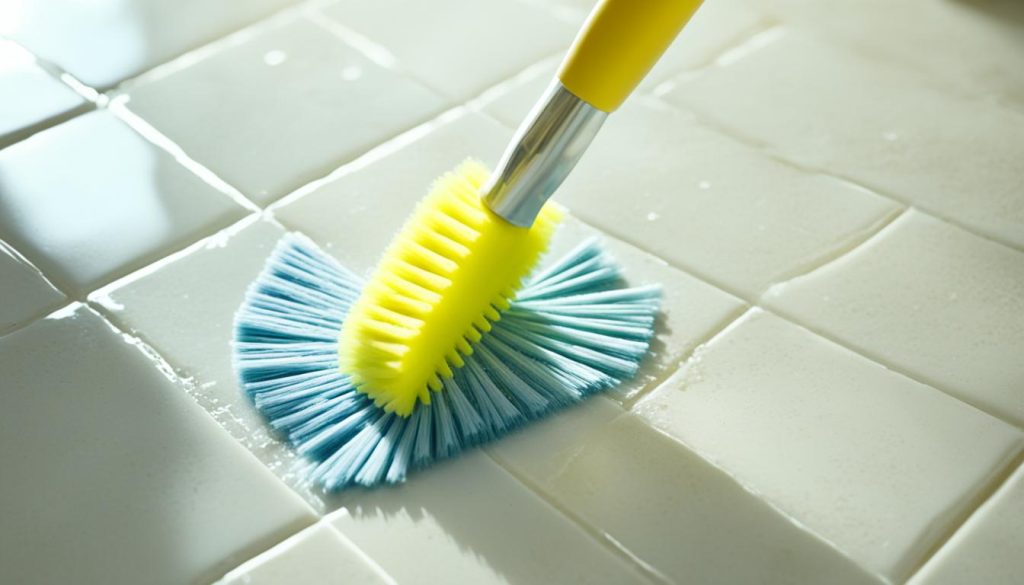
- Use the Right Tools: Grab a good grout brush to handle tough stains. Its tough bristles will make scrubbing more effective.
- Sweep Up Excess: Get rid of any extra cleaner or dirt before mopping. This stops the dirt from spreading when you mop.
- Patience is Key: Remember, cleaning grout the green way takes time. Being slow and patient is really important for the best results.
Just follow these simple steps to get your grout perfectly clean. You’ll use only natural, friendly stuff, and it’ll work beautifully. With a bit of effort and these handy tips, your kitchen floor will shine in no time!
“The key to effective natural grout cleaning is taking your time and using the right tools. With a little patience, your floors will look brand new.”

Common Questions About Natural Grout Cleaning
Many homeowners wonder if natural methods are good for cleaning kitchen grout safely. They often ask if the process is quick and simple, and if it’s okay to use hydrogen peroxide on grout.
Is This Method Fast and Easy?
The method using baking soda, hydrogen peroxide, and dish soap works well. It can get rid of tough dirt and stains. But, it’s important to put in some work and time. It may take longer than using store-bought cleaners.
The paste made from these ingredients should stay on the grout for 15-30 minutes. This helps break down the dirt. After that, the scrubbing and rinsing could take 30 more minutes, depending on the grout’s condition.
Although this method isn’t the quickest, it’s very effective. Your grout can end up looking new without harsh chemicals. Many people find the trade-off of time and effort worth it for a healthier home.
Is Hydrogen Peroxide Safe for Grout?
Hydrogen peroxide is a safe, natural alternative to bleach or harsh cleaners for grout. It’s better than bleach because it’s gentle but still strong against stains. And it doesn’t harm grout over time.
Using hydrogen peroxide in the natural cleaning mix is safe for your grout. The bubbling action helps lift dirt safely from its surface. After cleaning, just rinse well to keep your grout in good shape, with no damaging residue.
This safe and effective natural method with baking soda, hydrogen peroxide, and dish soap is a good choice for many. It’s perfect for those wanting to avoid harsh chemicals, especially on kitchen floors.
Tackling Extremely Dirty Grout
Even the toughest dirty grout can look new again with just a few natural items. This cleaning approach uses baking soda, hydrogen peroxide, and dish soap. These three things can make your grout bright and clean.
First, let the mixture of baking soda, peroxide, and dish soap soak on the grout for 10 minutes. This helps them get deep into the grout to clean it better. After waiting, scrub the grout lines with a brush.
You can make your grout sparkling clean with a little bit of effort. Baking soda rubs off grime while hydrogen peroxide and soap dissolve dirt. This leaves your grout looking new again.
For the best results, always wait 10 minutes after applying the cleaner before scrubbing. This ensures that the tough stains are fully removed. With some time and hard work, your grout will shine again.
“The key to tackling extremely grimy grout is to let the baking soda, hydrogen peroxide, and dish soap solution sit for at least 10 minutes before scrubbing. This allows the ingredients to penetrate deep into the porous grout material, loosening and lifting even the toughest grime and stains.”
Grout Cleaning Methods Compared
Not every way of cleaning grout works the same. Let’s look at how different methods compare:
- Magic Eraser: Less than a minute, 2/5 rating
- Hydrogen Peroxide and Baking Soda: 2 minutes, 3/5 rating
- Tide to Go Pen: 2 minutes, 3/5 rating
- Vinegar, Baking Soda, and Lemon Juice: 2.5 minutes, 4/5 rating
- Zep Grout Cleaner & Brightener: 5.5 minutes (including 3 minutes of waiting time), 5/5 rating
The solution of baking soda, hydrogen peroxide, and dish soap does very well. It’s an effective way to clean even dirty grout. With some perseverance, your grout can look new again.
Getting Grout Completely White Again
If your kitchen floor’s grout looks old and dirty, there’s a good way to clean it without toxic chemicals. Just mix baking soda, hydrogen peroxide, and dish soap. This mix will erase stains, making the grout white again.
Mix 7 cups of warm water with 1/2 cup of baking soda, 1/3 cup of hydrogen peroxide, and a few drops of dish soap. Apply this to the dirty grout and wait 10-15 minutes. Then, scrub hard with a brush. Do this a few times until you’re happy with how white the grout is.
This method uses simple, safe ingredients to clean the grout. You can make your floor’s grout how to get grout completely white and whitening discolored grout without spending much money. Your floor will look new and clean with a little effort.
Source Links
- How to Clean Floor Tile Grout: What Works & What Doesn’t! – https://www.drivenbydecor.com/how-to-clean-floor-tile-grout/
- How to Clean Grout Using Pantry Staples You Probably Already Have – https://www.bhg.com/homekeeping/house-cleaning/surface/how-to-clean-grout/
- How to Clean Grout | Two Ingredient DIY Grout Cleaner – Lemons, Lavender, & Laundry – https://www.lemonslavenderandlaundry.com/cleaning-tip-tuesday-diy-grout-cleaner/
- Best DIY Grout Cleaner – Back Road Bloom – https://backroadbloom.com/diy-grout-cleaner/
- I Tried 3 DIY Grout Cleaners — And One of Them Blew Me Away – https://www.apartmenttherapy.com/best-diy-grout-cleaner-test-36737568
- How to Clean Grout: We Tested 5 Methods – https://www.tasteofhome.com/article/how-to-clean-grout/
- The Easiest Way To Clean Grout Without Scrubbing | Maid2Match – https://www.maid2match.com.au/easiest-way-to-clean-grout-without-scrubbing/
- DIY Grout Cleaner: The Best Homemade Grout Cleaners – https://www.onegoodthingbyjillee.com/the-best-way-to-clean-grout/
- Use My Homemade Grout Cleaner and Get Rid of Stains Safely – https://housewifehowtos.com/clean/homemade-grout-cleaner/
- How We Got Our Stained Grout White Again | Young House Love – https://www.younghouselove.com/how-you-like-me-now-grout/
- My Zep Grout Cleaner Review [Before And After Photos] – https://www.onegoodthingbyjillee.com/zep-grout-cleaner/
- How to Clean Grout: The Best Deep Cleaners for Sparkling Tiles – https://www.cravingsomecreativity.com/how-to-clean-grout/
- How to Clean Grout Naturally with DIY Grout Cleaner – https://diynatural.com/how-to-clean-grout-naturally/
- How to Clean Grout: Tile & Grout Cleaning Tips – Simply Spotless Cleaning – https://www.simplyspotless.com.au/how-clean-grout-tile-grout-cleaning-tips/
- 7 Home Remedies for Cleaning Tiles and Grout (and One Bonus Suggestion) – https://www.aafloors.ca/7-home-remedies-clean-tiles-grout/
- How to Clean Tile Grout Naturally! – https://es.microfiberwholesale.com/blogs/blog/how-to-clean-tile-grout-naturally?igTg=9c995629-2bdb-4705-b293-ac4bcd4bc101&igTg=9c995629-2bdb-4705-b293-ac4bcd4bc101
- How to Clean Grout – The Best Homemade Grout Cleaner ⋆ Lifes Carousel – https://www.lifescarousel.com/how-to-clean-grout/
- 2-Ingredient Homemade Grout Cleaner – https://www.practicallyfunctional.com/make-your-own-grout-cleaner/
- We Tried 5 Methods for Cleaning Tile Grout — and the Winner Was Ridiculously Effective – https://www.thekitchn.com/best-method-cleaning-tile-grout-23270822
- How to Clean Grout: DIY Tips and Tricks | COIT – https://www.coit.com/blog/general-home-cleaning/how-clean-grout
- How to Clean Grout the Easy Way – https://www.realsimple.com/home-organizing/how-to-clean-grout
- How to Clean White Grout – https://www.mollymaid.com/practically-spotless/2017/september/how-to-clean-white-grout/
- How to Whiten Grout (with Pictures) – wikiHow – https://www.wikihow.com/Whiten-Grout
- How to Keep Your White Grout Clean: 7 Tips to Follow – https://www.angi.com/articles/tips-keep-your-grout-fresh-and-clean.htm

- How to Clean Kitchen Floor Grout Naturally: Easy DIY Methods - June 25, 2024
- How to Clean Thermoplastic Kitchen Cabinets Properly: Expert Tips - June 19, 2024
- How to Clean Mica Kitchen Cabinets: A Simple Guide - June 19, 2024


![How to Properly Clean Kitchen Cabinets [Step-by-Step Plan]](https://cleaningcarekits.com/wp-content/uploads/2023/07/how-to-properly-clean-kitchen-cabinets-768x512.jpg)