The kitchen is the heart of any home, and its cabinets play a pivotal role in both functionality and aesthetics. Over time, cabinets can accumulate dirt, grease, and grime, causing them to lose their original luster. Refinishing your kitchen cabinets is an excellent way to breathe new life into your space, but before you start applying that fresh coat of paint or stain, it’s crucial to thoroughly clean the cabinets. In this comprehensive guide, we’ll walk you through the step-by-step process of how to clean kitchen cabinets before refinishing, ensuring a smooth and successful makeover for your culinary haven.
Materials Needed:
- Mild dish soap
- Warm water
- Microfiber or soft cloth
- Sponge or soft-bristle brush
- White vinegar
- Baking soda
- Toothbrush
- Grease-cutting cleaner
- Wood cleaner or furniture polish
- Sandpaper (fine grit)
- Tack cloth
- Drop cloths or plastic sheets
Step 1: Clear the Space
Before diving into the cleaning process, remove all items from your cabinets. This includes dishes, utensils, and any other kitchenware. Clearing the space not only allows for easier access to every nook and cranny but also prevents any damage to your belongings during the cleaning and refinishing.
Step 2: Dust and Debris Removal
Use a soft cloth or a microfiber cloth to gently wipe away dust and loose debris from the cabinet surfaces. Pay special attention to corners, edges, and any decorative moldings. This preliminary step helps prevent dirt from being spread around during the cleaning process.
Step 3: Create a Homemade Cleaning Solution
Mix a few drops of mild dish soap with warm water in a bucket or basin. This gentle solution is effective in cutting through grease and grime without harming the cabinet finish. For stubborn grease stains, you can add a splash of white vinegar to enhance the cleaning power.
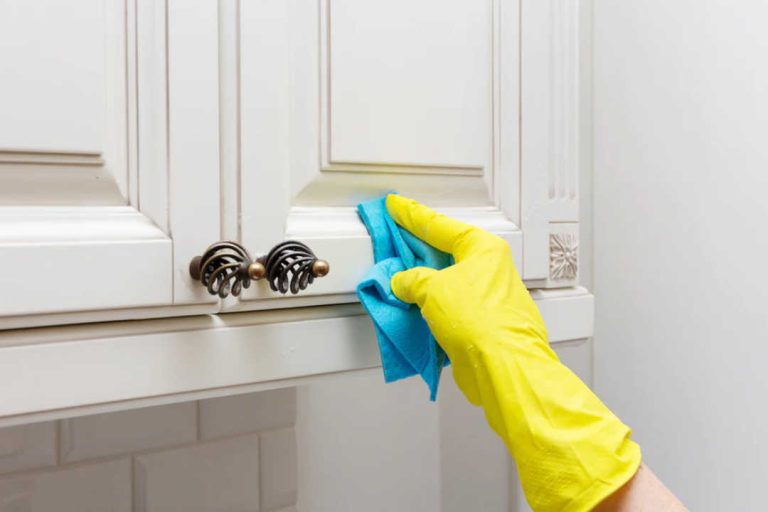
Step 4: Clean the Exterior Surfaces
Dip a sponge or soft-bristle brush into the soapy water solution and scrub the exterior surfaces of the cabinets. Work in small sections, paying close attention to areas around handles and knobs where grease tends to accumulate. Ensure you reach into corners and along edges for a thorough clean.
Step 5: Tackle Stubborn Stains
For stubborn stains or built-up grime, create a paste using baking soda and water. Apply this paste to the affected areas, gently scrubbing with a toothbrush to lift the stains. Baking soda is a mild abrasive that helps break down tough stains without damaging the cabinet finish.
Step 6: Address Grease Buildup
Grease buildup is common in kitchen cabinets, especially around cooking areas. Use a grease-cutting cleaner to effectively remove grease residues. Apply the cleaner according to the manufacturer’s instructions, making sure to wipe away any excess with a clean, damp cloth.
Step 7: Clean Cabinet Interiors
Don’t forget to clean the interior surfaces of your cabinets. Use the same soapy water solution to wipe down shelves, drawers, and the inside of doors. This step ensures that the entire cabinet space is refreshed and ready for the refinishing process.
Step 8: Sanding for Smoothness
Once the cabinets are clean and dry, lightly sand the surfaces using fine-grit sandpaper. This step helps create a smooth surface for the new finish to adhere to. Be sure to sand in the direction of the wood grain to avoid scratches.
Step 9: Remove Sanding Residue
After sanding, use a tack cloth to remove any sanding residue from the cabinet surfaces. This ensures a clean and dust-free surface for the refinishing materials to adhere properly.
Step 10: Protect Surrounding Areas
Before applying any refinishing products, protect your kitchen by covering surrounding surfaces with drop cloths or plastic sheets. This precautionary measure prevents accidental spills or splatters from damaging your countertops, floors, or appliances.
Step 11: Apply Wood Cleaner or Furniture Polish
For an extra layer of protection and to enhance the cabinet’s natural beauty, apply a wood cleaner or furniture polish. Follow the product’s instructions to ensure proper application and buff the surfaces to a glossy shine.
Frequently Asked Questions About How To Clean Kitchen Cabinets Before Refinishing
Q1: Why is it important to clean kitchen cabinets before refinishing?
A1: Cleaning kitchen cabinets before refinishing is crucial to ensure the new finish adheres properly. Removing dirt, grease, and grime not only enhances the aesthetics but also promotes a longer-lasting and more durable result.
Q2: Can I use any soap for cleaning kitchen cabinets?
A2: It’s recommended to use a mild dish soap for cleaning kitchen cabinets. Harsh chemicals may damage the cabinet finish, so a gentle soap mixed with warm water is effective in cutting through grease without causing harm.
Q3: How often should I clean my kitchen cabinets?
A3: Regular cleaning is essential to maintain the appearance of your kitchen cabinets. Depending on usage, aim to clean them at least once every few months, or more frequently if you notice a buildup of dirt or grease.
Q4: What’s the best way to remove stubborn stains from cabinets?
A4: Create a paste using baking soda and water to tackle stubborn stains. Apply the paste to the affected areas and gently scrub with a toothbrush. Baking soda’s mild abrasive properties help break down tough stains without damaging the cabinet finish.
Q5: Can I use vinegar to clean kitchen cabinets?
A5: Yes, white vinegar can be added to your soapy water solution for added cleaning power. It helps cut through grease and acts as a natural disinfectant. However, be sure to dilute it properly to avoid any potential damage to the cabinet finish.
Q6: Do I need to remove cabinet doors for cleaning?
A6: While it’s not always necessary to remove cabinet doors for cleaning, doing so can provide easier access to all surfaces. If possible, consider taking off the doors and hardware for a more thorough cleaning process.
Q7: Should I clean the inside of the cabinets too?
A7: Yes, it’s essential to clean the interior surfaces of cabinets. Use the same soapy water solution to wipe down shelves, drawers, and the inside of doors. This ensures that the entire cabinet space is refreshed and ready for refinishing.
Q8: What type of sandpaper should I use for prepping cabinets?
A8: Use fine-grit sandpaper for prepping cabinets. This helps create a smooth surface for the new finish to adhere to without causing deep scratches. Sand in the direction of the wood grain for the best results.
Q9: How long should I wait after cleaning before refinishing cabinets?
A9: After cleaning, allow the cabinets to dry completely before moving on to the refinishing process. This typically takes a few hours, but it’s essential to ensure that the surfaces are free from moisture before applying any new finish.
Q10: Can I use furniture polish on kitchen cabinets?
A10: Yes, you can use wood cleaner or furniture polish on kitchen cabinets after cleaning and sanding. Follow the product’s instructions for proper application, and it will not only protect the cabinets but also enhance their natural beauty.
Conclusion:
Refinishing your kitchen cabinets can transform the entire look and feel of your culinary space, but proper preparation is key to a successful project. By following this comprehensive guide on how to clean kitchen cabinets before refinishing, you’ll ensure that your cabinets are free from dirt, grease, and grime, providing a clean canvas for the new finish. Take the time to invest in the cleaning process, and you’ll be rewarded with a refreshed and revitalized kitchen that you’ll be proud to showcase to friends and family.

- How to Clean Kitchen Floor Grout Naturally: Easy DIY Methods - June 25, 2024
- How to Clean Thermoplastic Kitchen Cabinets Properly: Expert Tips - June 19, 2024
- How to Clean Mica Kitchen Cabinets: A Simple Guide - June 19, 2024